Category: legacy
Intro
So you want to get in to game hacking. Maybe you’ve been coding for years or this is your first time even considering getting into it. No matter what your background is, we all have to start from somewhere, and this tutorial will assume that you have no programming knowledge whatsoever, however this should hopefully suit absolutely everyone who wants to get into the subject.
What is Game Hacking?
In my opinion, game hacking is simply the process of using a game’s memory to your advantage. Even with simple tools like Cheat Engine, just by changing values, you can call yourself a game hacker. There are always further and more complicated stages to get to so don’t think that’s all there is.
Programming Languages
A question people ask a lot when starting out is what programming language should I learn first? There are many to choose from but I would personally suggest learning some Python to understand computational thinking then C++ to carry on into more lower level programming. I specifically say C++ because that is the language most games are written in. Why does this matter you say? This is because for a cheat to be internal, it is greatly preferred for it to be written in the same language, as writing a C# internal for a C++ game is a massive pain in the ass. A C based language is not necessarily needed to create a cheat. There are many examples of ones created in JavaScript, Java or even Python. As long as the language is able to read/write memory, a cheat is perfectly possible.
Internal vs External
If you have done some research or even have just been a regular customer, you may have seen the terms “internal” and “external” cheats. These two methods of creating cheats achieve the same thing but are done in two very different ways. An external cheat has to open some sort of “pipe” to a program, where it is then able to start reading and writing memory. Every single request to do so goes through the OS and is therefore very slow. Internal cheats on the other hand run inside of the program that you are trying cheat in. This means the cheat has direct access to memory allowing very fast reads and writes. Overall, internals are preferred to externals, however the latter be needed to bypass certain anti-cheats. Despite being harder than internals, I would recommend starting off your first self-written cheats as externals as they require research and some familiarity with MSDN/the Windows API. They also teach efficiency as you want to read and write memory as little as possible due to the OS overhead that I mentioned previously.
Programs
Before starting, we will need a few programs:
AssaultCube - A free open source FPS game that has multiplayer. This is the game we will be reversing and is most commonly used for beginners. Cheat Engine - This is a tool that will give us a starting point into our adventure.
Pointers
For you to understand what exactly is going on here, I would like to give a little theory lesson on variables and pointers. First, a variable is a sort of container in programming that is used to store a value. For example int x{5}; creates an integer (a number that doesn’t have a decimal), calls it x and gives it the value 5 when the program is run. During execution, it also stores this in RAM and gives us an address so we can find the information. Pointers are variables that are specifically for holding the address of other variables.
#include <iostream>


int main() {
    int x{5};
    int* xPointer{ &x };
    std::cout << "The integer x has the value of: "<< x << " and the address of: " << &x << '\n';
    std::cout << "The pointer xPointer has the value of: "<< xPointer << ", the address of: " << &xPointer << " and the derefernced value of: " << *xPointer;
    return 0;
}
As a quick explanation: std::cout means print text to the console. x on it’s own means the value will be outputted. &x means the address of the variable. *xPointer means dereference. The first thing that might confuse you here is dereference. All it means is find the address that the pointer holds and get the value of it. All in all, this just shows that xPointer holds the value of the address of x and from a pointer you can get the value of what is being pointed to.
Reversing
Time for some actual hacking!
First you will want to open up Cheat Engine and AssaultCube. Your Cheat Engine should look like this:
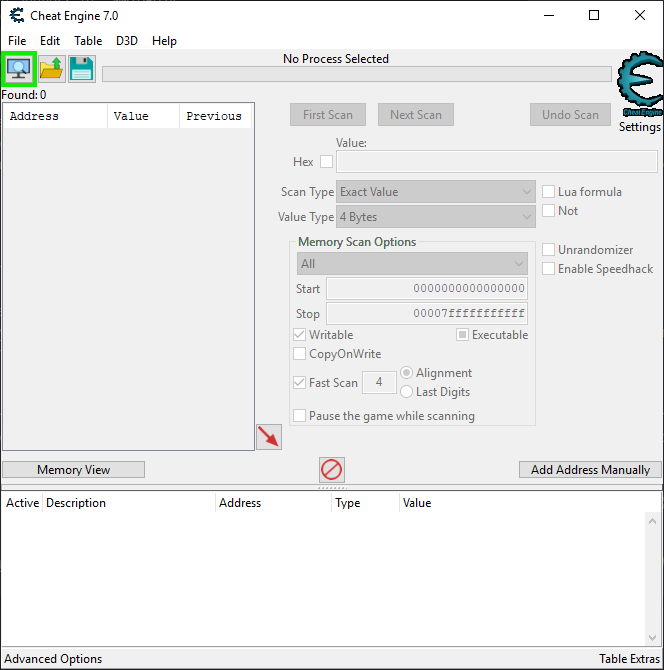
If you click the flashing button in the top left, a list of programs will come up and you’ll want to double click on AssaultCube.
Our goal here is to find the address of the player’s health, so we can give ourselves a lot of it. Cheat Engine is a great tool to do this as you can search for a value and get an address from it.
Type 100 into the box and hit first scan. We should get our health address:
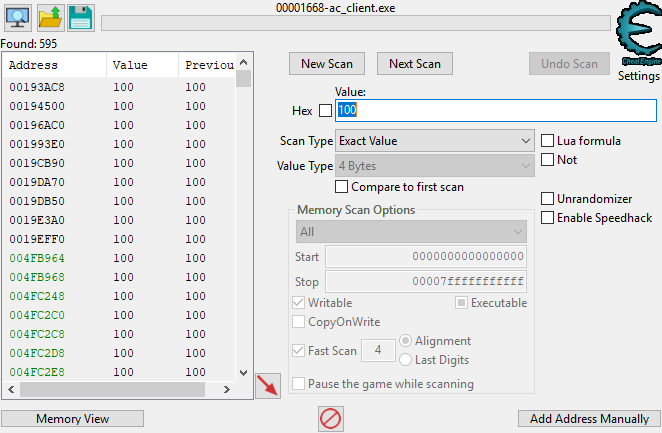
595 results :/ (you may get more or less)
You should at least notice that there are green and black addresses. Green addresses are ones that never change and black addresses are ones that change every execution.
Now to narrow down the results. Cheat Engine also features a “Next Scan” button. This allows you to find the addresses that meet a specific change. For this to work, we need to change the value first and we can do this by damaging ourselves with a grenade.
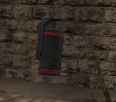
My health afterwards was 76 so I put that in and hit next search. Essentially, we’re looking at all the addresses that started at 100, then changed to 34. Here, you’d put whatever health you got to.
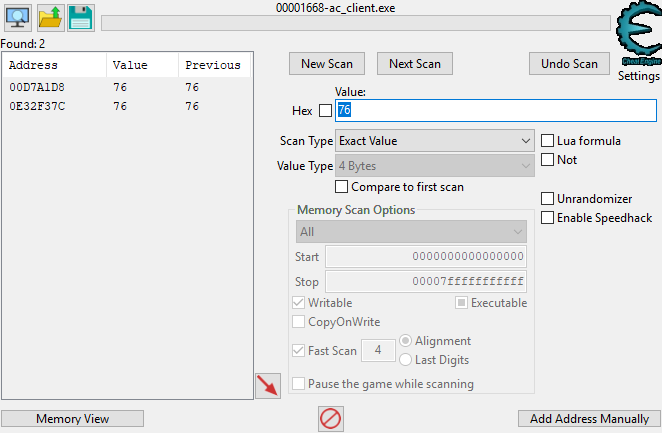
As you can see, I have two values. If you have more, keep damaging yourself and hitting next scan.
The reason for us having two is we are hosting a server as well and playing on a client so the server and client need to both store the health. We are not interested in the server’s value so we must distinguish them.
If you double click them they should go to the bottom box, and double clicking on their values should allow you to change them.
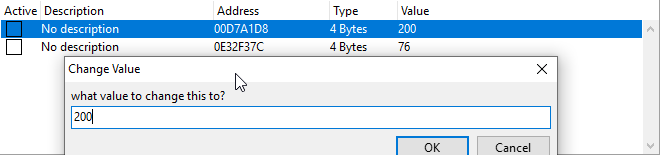
Whichever one directly changes the value you see in the game is the client’s one. You can right click and delete the other one.
This is cool and all but remember when I said black addresses change every execution? Well we need to fix that.
You can find out what assembly instruction executes when you lose health by clicking on the address at the bottom and pressing F6. A confirmation will pop up and just hit yes.
Take damage again and you’ll see something pop up in the debugger. Double click it and you’ll see this:
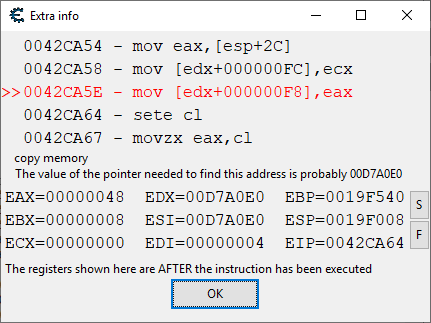
This is the first bit of assembly we’ll deal with and hopefully shouldn’t be too difficult. First, the red line indicates the assembly that is being run when you lose health. MOV means move the contents of the second address into the first. EDX and EAX etc. Are called registers in programming. You can think of these as pointers as all they do is store the address of something. The square brackets mean dereference, as explained above. The plus sign itself means “with an offset of” and the F8 is the offset. This is important. Essentially what is happening here is the contents of EAX are being dereferenced. EDX is being dereferenced then F8 is being added to the value and is then dereferenced again. The content of EAX is then moved into [EDX+F8].
Where the data is being moved to is important so we want to find out where that is. The value of EDX is 010FA0E0 (will be different for you). This would be the value after dereferencing something else and we want to find out what that something else is.
Click new scan, hit hex and paste in the value of EDX. Hit First Scan and you should see this:
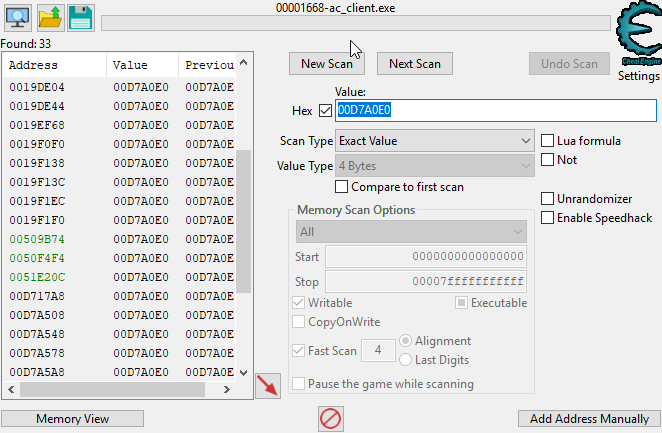
I scrolled down a bit and as you can see, there are three green addresses. These are static and will never change after a restart.
You can double click on any of these but the middle on is more useful due to it being close to the EntityList (Something I might make another guide on).
I will show everything with the first address just to prove that they all do the same thing.
After double clicking it and it being added to the bottom, double clicking on the address should give you something like this:
ac_client.exe+109B74
This shows it’s static as it gets ac_client.exe (the module’s base address) and offsets it by 109B74. - You probably won’t understand that but I will once again show that in the future.
Remember what I said earlier about F8 being important? We’re going to use this static address to get back to our health now, so copy the ac_client.exe+109B74 (or whatever static you’re using).
If you click Add Address Manually then pointer, you can paste the line you just copied into the bigger box. This means dereference what is at ac_client.exe+109B74.
The offset box at the top means add this hex value to the dereferenced value and dereference again. As I said earlier, the F8 is important and this is where you’d put it.
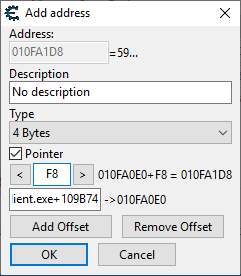
This is exactly the reverse of what I explained earlier in the debugger. Hitting OK means you have something that will always point to the health value of the player despite the game restarting.
Now if we want to find other values like armour/ammo, it’s a pretty big pain doing this process all over again. Instead we can browse that region of values.
To do this, click Memory View and hit Ctrl-D to take you into the Dissect Data Structures menu.
Paste in the static address we copied and hit Ctrl+N. Here you can put anything since you probably won’t understand what it means at this point. I would put Entity if you’d like to go further into my tutorials.
Hitting OK again will cause something to pop up and you will want to click the first arrow.
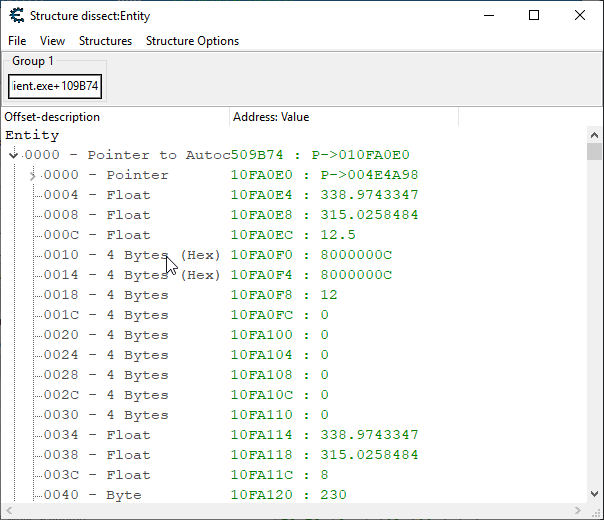
This is showing us a graphical view of what we see after dereferencing ac_client.exe+109B74.
If you scroll down to F8, you should see the health value, confirming this.
Here you can find and mess around with a lot of the values. Double clicking on the values will allow you to change them and double clicking on the data type (e.g 4 Bytes) will allow you to rename what it is.
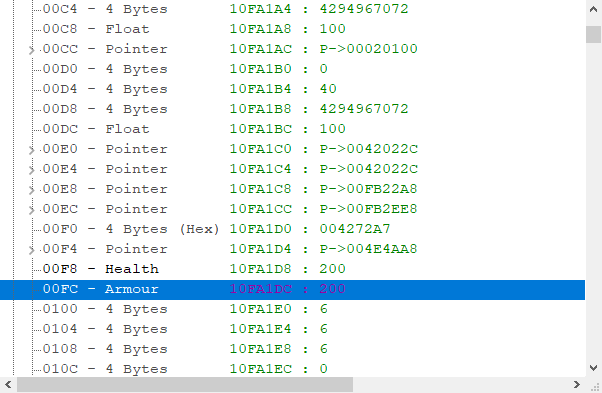
Try find some other cool offsets and have fun reversing!